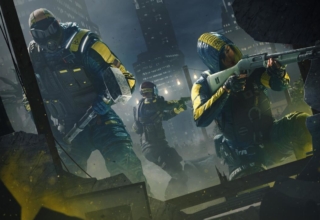
Your avatar is typically what someone will notice immediately about you. Alongside every message in Discord, on your stream and everywhere else you are online, it travels with you. Therefore, when creating an avatar that others can recognize easily, simple designs such as a clear viewable face, one particular color that stands out or something unique that is visible to others may be more effective than complex costumes.
Anime inspired avatars allow for many design options. From a description of yourself, a photo of yourself or even a character study, an AI tool can take these concepts and generate multiple versions. Ultimately, after using an AI tool to create multiple versions of an avatar, you will need to select the version that you feel will work best as your online avatar/profile picture.
For people who want to experiment quickly, an ai anime generator can help create several avatar ideas without requiring professional drawing skills. The best results still come from a clear concept, suitable reference material, and careful review of the final image.
Decide What the Avatar Should Represent
Before you open the generator, think about the personality and identity you want to show off.
Your avatar does not have to look like you. It is just as easy for it to be an embodiment of the role you are playing or the overall tone of your stream. For example, if you are a strategic player then you will likely want to choose a serious expression, wear a tactical jacket and select a darker blue as your interface background. If you are a fan of racing, then you may want to take inspiration from helmets by designing your avatar in that style and adding brighter colors to highlight this theme. And if you enjoy relaxing and streaming co-op games then you may want to create a softer warm expression and use soft warm colors.
Write down two or three traits. A competitive personality, a favorite genre and one color are enough to get started. You can add details once the basic design feels right.
Choose the Image Type
Where will viewers be able to view your image? Make that decision first. A usable banner and a usable profile picture have very different compositions.
Close-Up Portrait
Close-ups place the majority of the frame on the face. This is generally a great way to begin with small icons for a gaming account (e.g. Steam, Xbox) as well as a profile picture for platforms like Discord. The Discord profile customization guide offers help in changing avatars via User Settings.
Half-Body Avatar
Half-bodies are best suited to images where clothing and posture play important roles. They allow for jackets, headphones, etc., while still allowing enough room for facial recognition. Ensure that accessories don’t cover up facial expressions.
Full Character Design
Full-body designs give you ample opportunity to display footwear, equipment and/or costume details. Use these types of designs for banners, stream layouts or other large-scale community graphics. Reducing a full-body character to an extremely small icon will often make it hard to recognize.
Create a Clear Prompt
Describe the character, expression, colors and setting in plain language. For example:
“Create an anime-inspired gamer avatar with short silver hair, a dark hoodie, blue lighting, a confident expression, and a subtle futuristic gaming background. Use clean linework and a square composition.”
That gives the tool a direction without filling every corner of the image. If something is missing, add it on the next attempt. Useful details include an age range, hairstyle, clothing, pose, lighting, accessories and the image format you need.
Read the prompt once before submitting it. If several instructions compete for attention, choose the most important ones and remove the rest.
Use Reference Images Carefully
A reference could help with posing, a palette of colors or how to arrange clothes. You could use your own photo, a drawing or a suitable mood board as a beginning. Be sure that whatever you upload, you are allowed to do so, and try to cut out others in the personal photos.
Use the reference as a source of inspiration. References such as “vibrant/ fast paced action anime,” “delicate/fantasy illustration style” or “future/comic inspired designs” allow for original characters. If you copy a well known video game character too closely, this would be likely to appear as if your account was an actual official account.
Keep the Face Easy to Recognize
The face should survive a reduction in size. Any blending of hair into the background (blurring), heavy shadows or objects beside the head can make it harder to identify.
Check closely at eyes and facial shape. Check the outline of your hair. Glasses. Masks. Headphones. Any distinctive marks. Is the lighting helping you read your face, or obscuring it?
If the features are not looking right, try a closer crop, or a simpler prompt. Usually two clear details are easier to recognize than a face with many small accessories.
Add Gaming Details
Choose accessories that show off your style of gaming. Accessories like headsets that have microphones, controllers, handheld consoles, team badges or fantasy weapons help to give the character context. For example, keyboards or slightly visible interfaces are good for portraits where you are playing while live streaming.
At first, use just one or two main accessories. Too many can hide the face or give the generator more objects to get wrong. Test the controller by itself and test the headset alone. Even an otherwise good portrait can contain a bent mic or a misshapen button.
When you want to create a portrait that looks like what you would see in a game, start with a general idea (genre, equipment type, etc.) and color palette. Make sure the design is different enough so people can tell you apart from other gamers.
Choose the Right Background
A good starting point is to choose either a single color (solid) or a soft gradient. The most important thing it will do is help separate your characters from the rest of the page with minimal distraction. If you go for neon gaming environments, futuristic cityscapes, fantasy lands or dark space backgrounds, just make sure there’s enough contrast to still see what’s on their face.
You should also be able to blur or use less detail if your image has many objects. Although something that looks great at larger resolutions may appear as clutter when the face is viewed at smaller sizes.
Banners and overlays have more room, so keep a more detailed background version for those uses.
Generate Several Versions
Try a few small adjustments instead of rewriting the whole prompt.
Change the expression of your subject, change the light source on your model or try a different background; keep the main subjects’ characteristics the same.
Check for facial consistency (proportions) as well as the overall colors in the image. Assess how you’ve placed accessories in relation to the model, and if the background is helping create a good portrait. Choose the version that stays clear as a small profile picture, even if another looks more elaborate at full size.
Save strong versions separately. You might prefer one expression for your profile, another for a thumbnail and a wider composition for your channel banner.
Correct Common AI Problems
Before you post a picture, make sure to inspect it. Most common errors that people see are fingers (or other body parts) sticking out, eyes not being even, some kind of weird hand shapes, headphones twisted around their ears, stuff floating off a controller, clothing with abnormal designs, and objects in the background repeating themselves. Zoom-in on the faces, hands, and edges of things and take another glance when looking at it normally. Remove or replace unreadable letters using an editor if possible. If local editing is available, fix the affected area. Otherwise, simplify the relevant instruction and generate another version.
Make the Avatar Useful at Small Sizes
Test the portrait where you intend to use it. View it as a Discord profile picture, a gaming platform icon, a streaming profile and a small comment image. A circular crop may hide details that remain visible in a square preview.
If recognition disappears, enlarge the face, remove a small accessory or increase contrast with the background. Look at it on a phone as well. You want someone scrolling past a message to identify the character without opening the full image.
Match the Avatar to Your Brand
Creators benefit from a few recognizable features across platforms. Keep the same main colors, hairstyle or accessory when making different expressions and poses.
Build a small set around the primary avatar: a serious expression, a humorous expression, a reaction pose, a banner and a version without a background. This gives you useful material for announcements and thumbnails without redesigning the character every time.
Create Transparent Versions
A cutout can sit over a stream, video thumbnail or event poster. Check the edges after removing the background, especially around hair, headphone cables, clothing and equipment. Rough outlines may show up against a different color.
Keep both the cutout and a finished background version. Mozilla’s image format guide explains that PNG supports full alpha transparency, while JPEG does not. Export the transparent copy in a format that retains it, and reopen the file to check the result.
Respect Privacy and Ownership
Before uploading a personal photograph, read how the service processes and stores reference images. Avoid using private pictures of friends, family or other players without their permission.
Check the service’s terms for generated images and commercial use, especially if the avatar will represent a monetized channel, team or campaign. Do not use the design to impersonate someone or imply an official connection to a game or organization.
Use the Avatar in Your Gaming Content
Once the main design works, try it in profile images, stream overlays, thumbnails, banners, Discord announcements and team graphics. Different expressions can suit different posts while the character remains familiar.
If you later want a moving version, CriticalHit’s guide to animating characters from reference video explains how an image and a performance reference can be used together. Start with a consistent still design before experimenting with movement.
A Simple Creation Workflow
- Decide what the avatar should represent.
- Choose a portrait, half-body or full-body composition.
- Write a short prompt and prepare suitable references.
- Generate variations and save the clearest options.
- Correct visible errors and test the image at a small size.
- Create a transparent copy and a banner version.
- Keep the original files alongside your exports.
- Review privacy, ownership and usage terms before uploading.
Final Thoughts
A useful gaming avatar starts with an idea you can recognize at a glance. Keep the face clear, make deliberate color choices and add only the equipment the design needs. Generate a few alternatives, inspect the details and test the actual profile crop before settling on one.
Once that version works, you have a character you can carry across streams, communities and videos without starting from scratch.
Last Updated: November 17, 2026